Installing LCZ4r in QGIS
Max Anjos
October 25, 2025
Source:vignettes/instalation_lcz4r_qgis.Rmd
instalation_lcz4r_qgis.Rmd🚀 Getting Started: Installing LCZ4r in QGIS
Welcome to the LCZ4r-QGIS plugin installation guide! This document will guide you through the setup process to enable Local Climate Zone (LCZ) analysis within QGIS. With LCZ4r, you can enhance urban climate analysis by integrating advanced R functionalities directly into your GIS environment.
You can watch a detailed tutorial on installing LCZ4r in QGIS below:
🗃 Step-by-Step Installation Guide
1. Install R (Version <= 4.3)
The R is an open-source software environment for statistical computing and graphics, required to run LCZ4r scripts. Follow these steps:
2. Install the Processing R Provider in QGIS
The Processing R provider plugin allows you to run R scripts directly in QGIS. To install it:
- Open QGIS and go to Plugins > Manage and Install Plugins.
- Search for “Processing R Provider” and click Install.
- Once installed, ensure the plugin is activated in Plugins > Installed.
3. Download and install the LCZ4r Scripts
To integrate LCZ4r functionality into QGIS, you need to download the R scripts for your preferred language:
- Visit the QGIS-LCZ4r Integration page.
- Download the R scripts in your preferred language.
- Unzip the downloaded file and save the scripts in an easily accessible location.
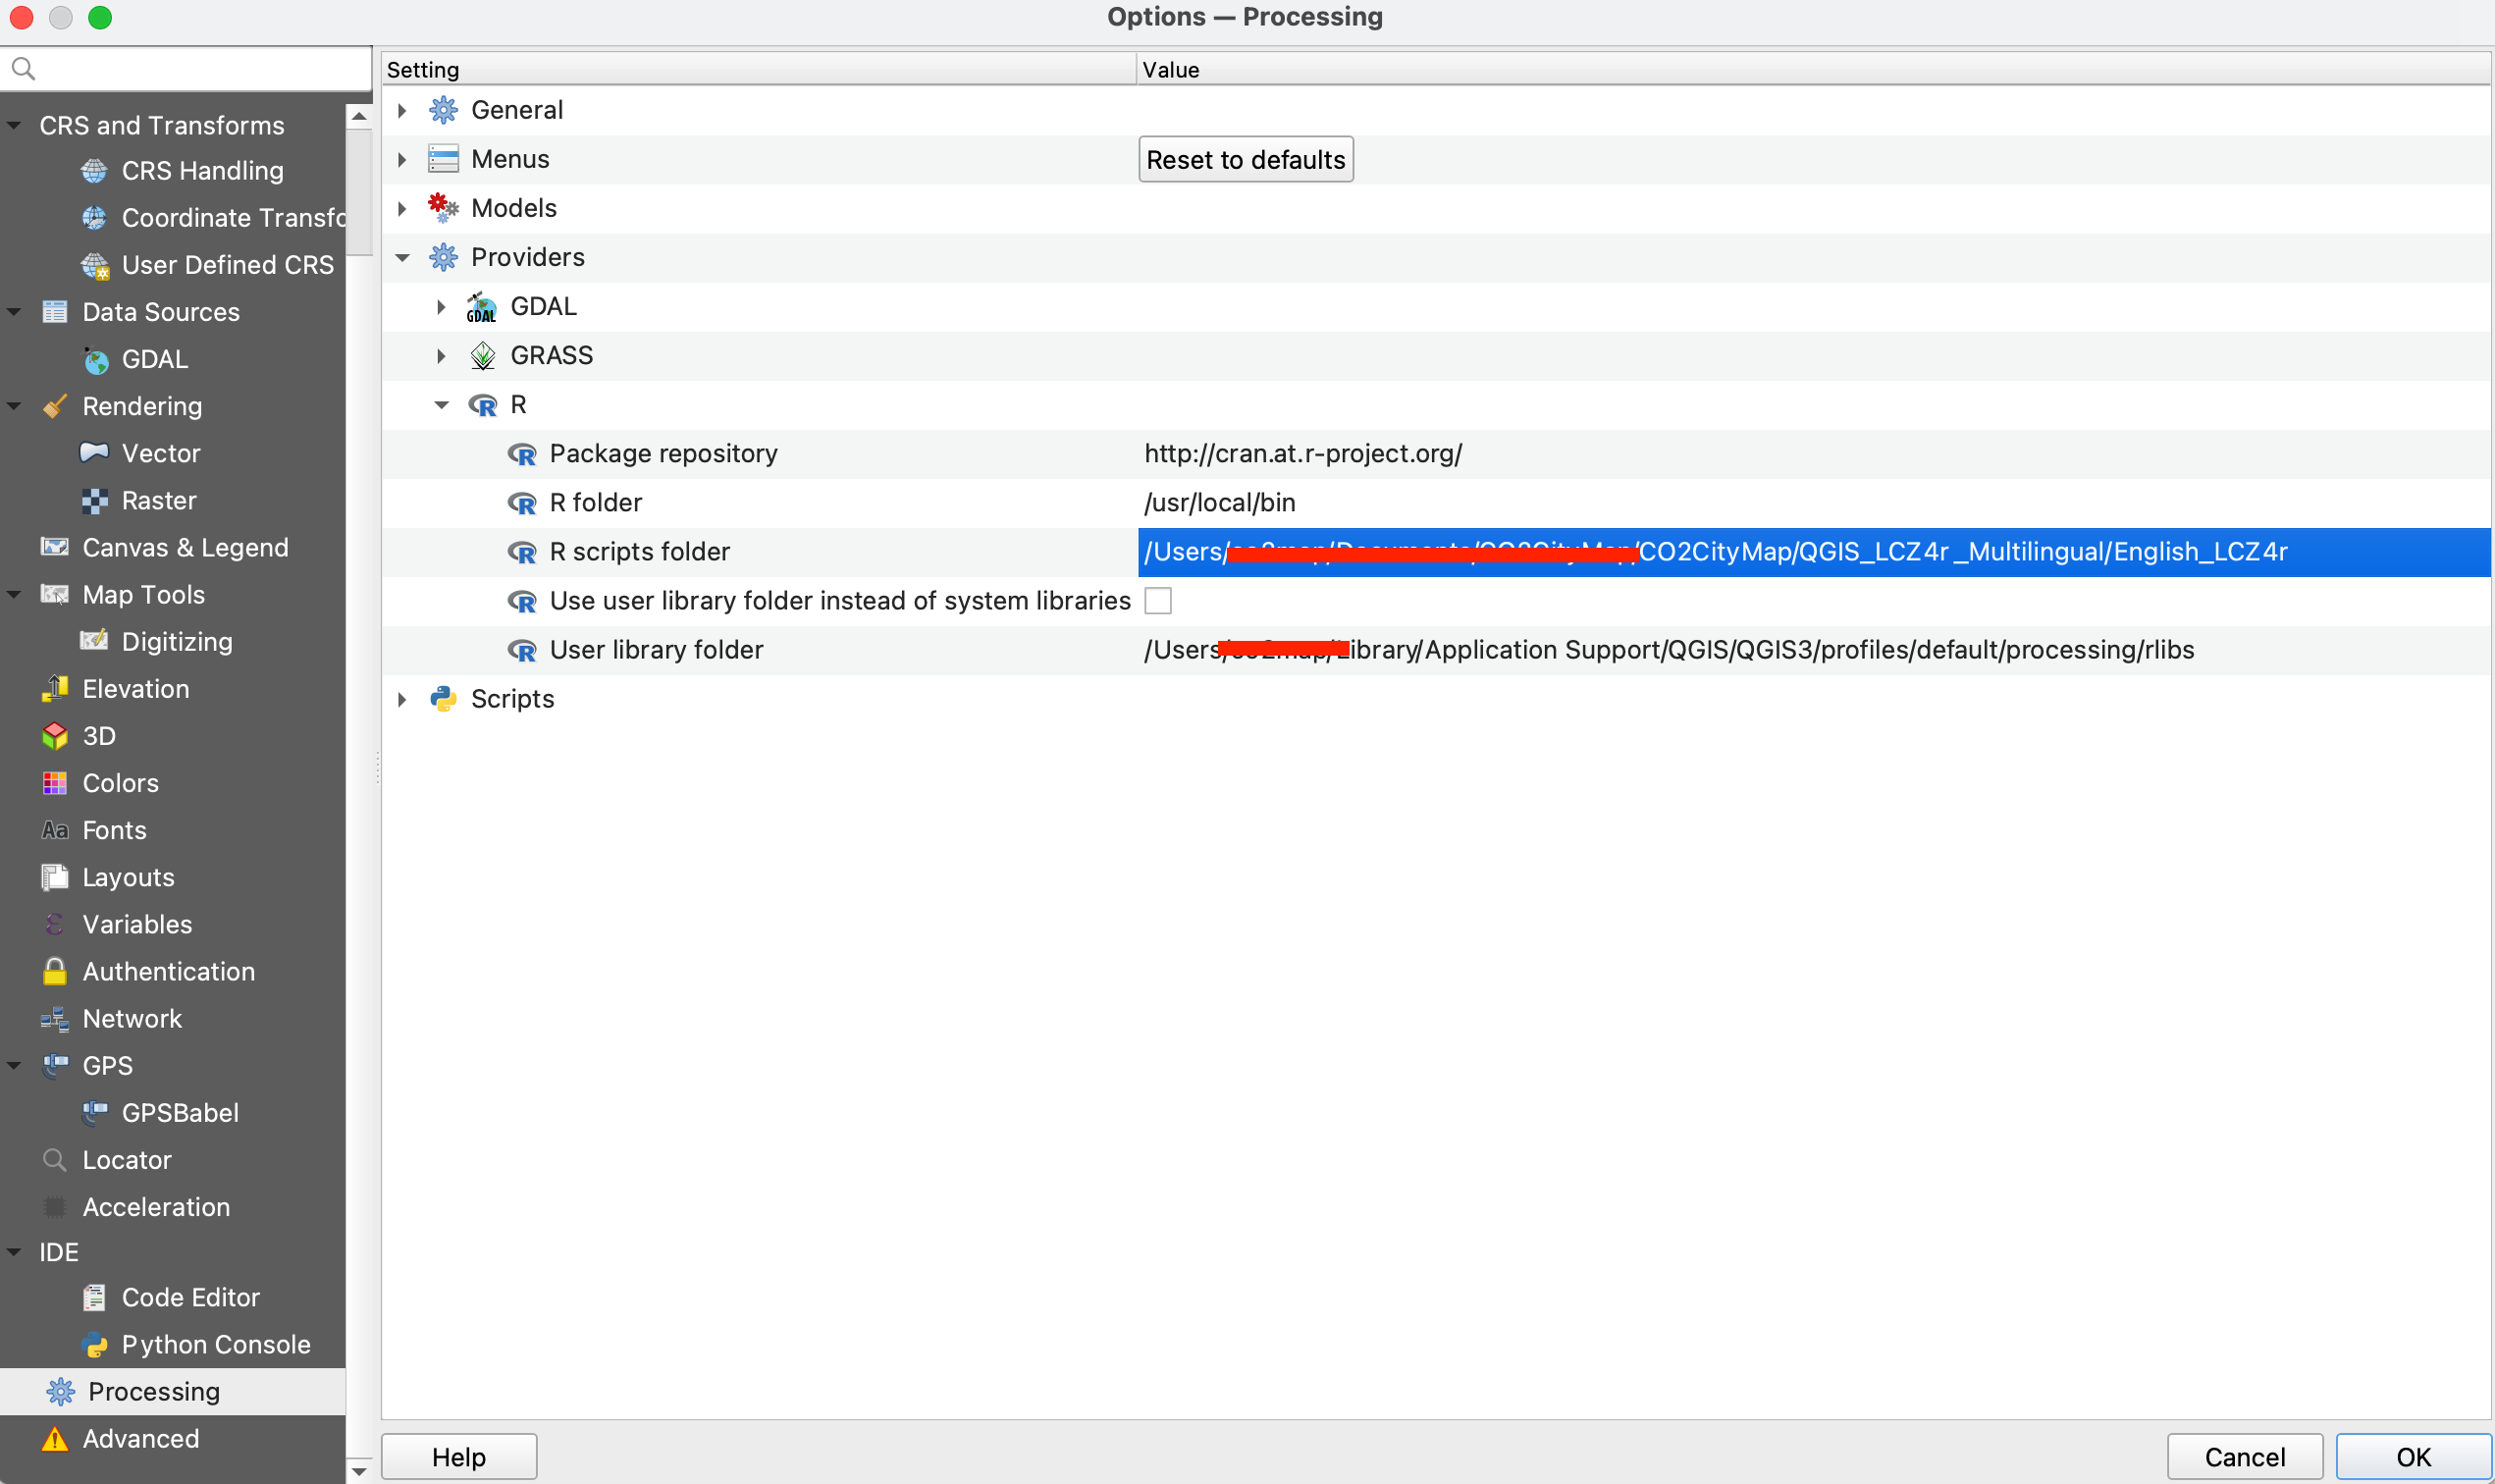
- Open QGIS and got to Settings > Options… > Processing > Providers > R.
- Under R scripts folder, add the path where you saved the LCZ4r scripts.
- Disable Use user library instead of system libraries.
- 7.Click OK to confirm your setup.

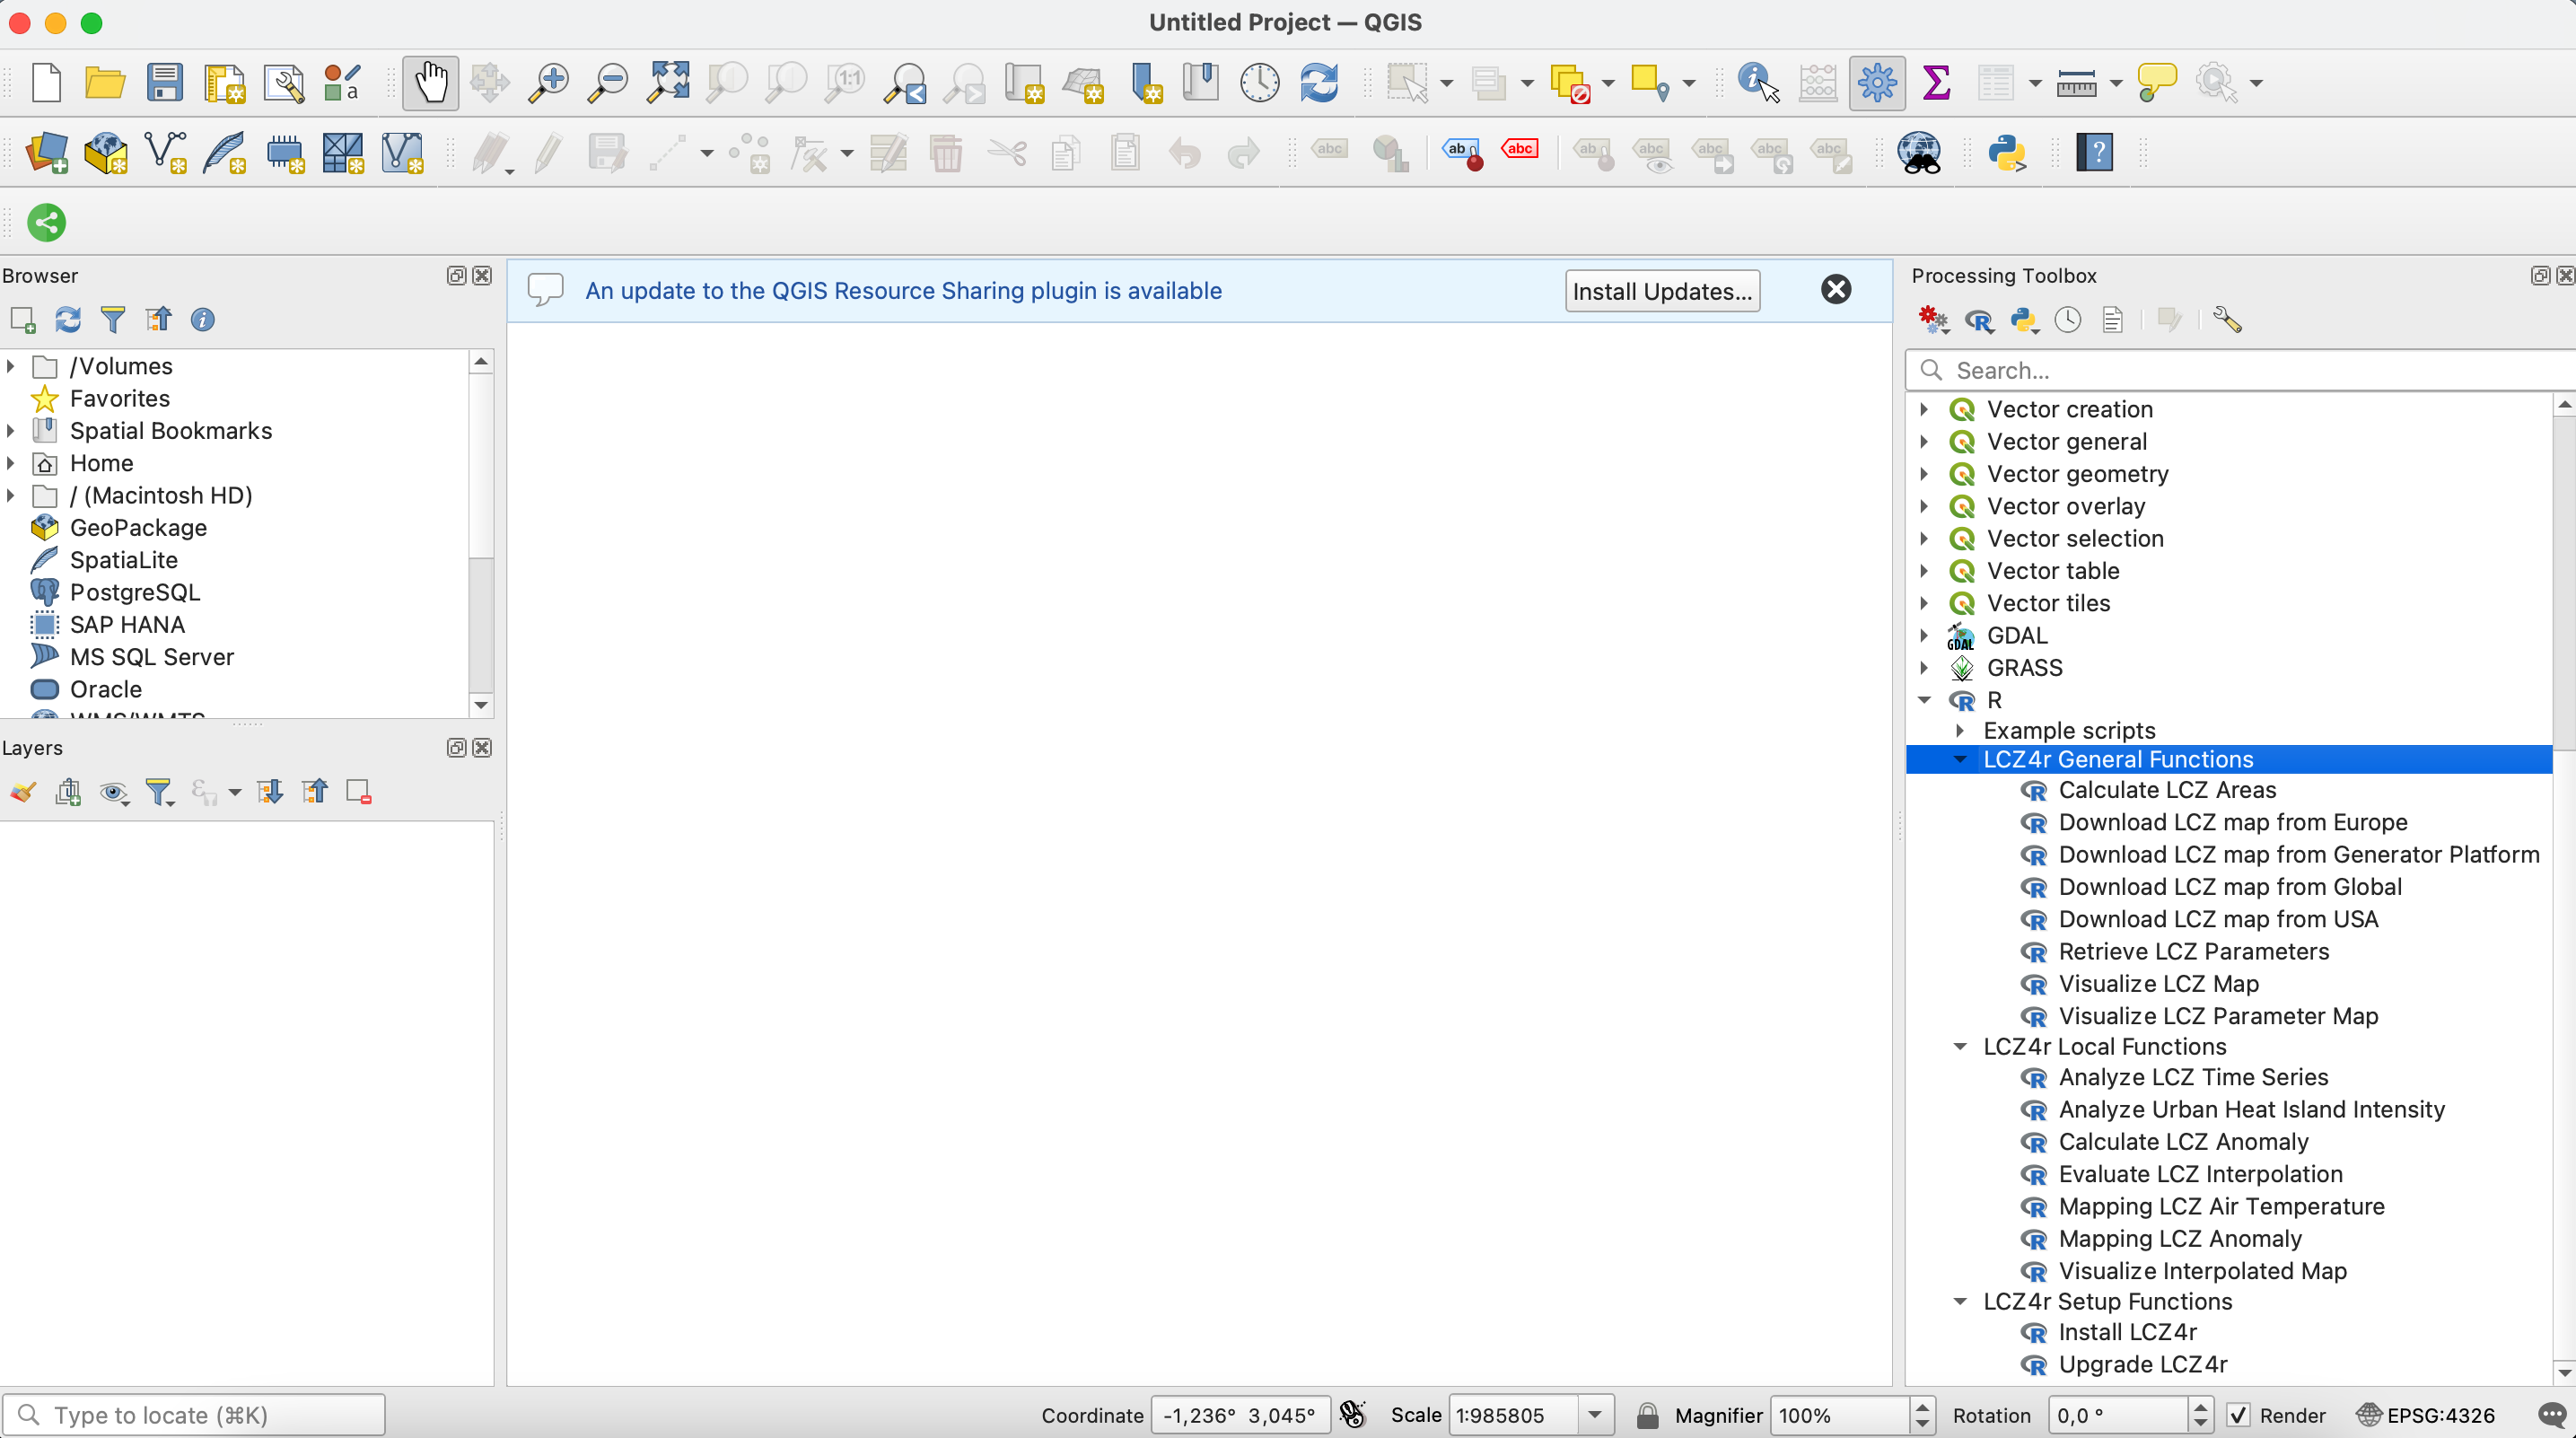
If everything is configured correctly, you will see LCZ4r General Functions, LCZ4r Local Functions, and LCZ4r Setup Functions in the Processing Toolbox >R below Example Scripts.

4. Install the LCZ4r package and additional necessary packages
Begin by running the Install LCZ4r function under LCZ4r Setup Functions. This step will install the LCZ4r package along with any additional necessary packages.
💡 Please note that the first time you run this script, it may take longer as it installs all dependencies. Thank you for your patience!
5. Run your first LCZ4r Script
Next, run the Download LCZ map function under LCZ4r General Functions.
🌟 Once the process is complete, you should see the output LCZ map. Congratulations! You’re now ready to explore the functions of the LCZ4r-QGIS plugin!.
6. Upgrade LCZ4r regularly and select language functions
To ensure you benefit from the latest improvements (including new languages), run the Upgrade LCZ4r function under LCZ4r Setup Functions.
Select the folder where the script be stored. To do this, navigate first to the same directory where the scripts are installed:
🌟Open QGIS and got to Settings > Options… > Processing > Providers > R > R scripts folder.
Next, select your language and click Run.