Installing LCZ4r in QGIS
Max Anjos
April 24, 2026
Source:vignettes/instalation_lcz4r_qgis.Rmd
instalation_lcz4r_qgis.Rmd🚀 Getting Started: Installing LCZ4r in QGIS
Welcome to the LCZ4r-QGIS plugin installation guide! This document will walk you through the setup process to enable Local Climate Zone (LCZ) analysis within QGIS. With LCZ4r, you can enhance urban climate analysis by integrating advanced R functionalities directly into your GIS environment.
Why LCZ4r in QGIS?
- Seamless Integration: Run R scripts directly from QGIS without switching applications
- Spatial Analysis: Leverage QGIS’s powerful GIS capabilities alongside LCZ4r’s climate analysis
- Reproducible Workflows: Document and share your analysis workflows easily
- Multilingual Support: Available in multiple languages for global accessibility
📺 Video Tutorial
Watch this step-by-step video tutorial for a visual guide to the installation process:
📌 Prerequisites
Before proceeding, ensure you have the following software installed:
| Software | Version | Purpose | Download |
|---|---|---|---|
| QGIS | 3.16 or higher | Geographic Information System | qgis.org |
| R | 4.0 or higher | Statistical computing environment | cran.r-project.org |
💡 Tip: Ensure R is added to your system’s PATH during installation. This allows QGIS to communicate with R seamlessly. On Windows, check “Add R to system PATH” during installation.
🗃 Step-by-Step Installation Guide
Step 1: Install R (Version 4.0 - 4.3)
1 Install R
R is an open-source software environment for statistical computing and graphics, required to run LCZ4r scripts.
Download R from CRAN for your operating system: - Windows: R for Windows - macOS: R for macOS - Linux: R for Linux
Step 2: Install the Processing R Provider in QGIS
2 Install Processing R Provider
The Processing R Provider plugin allows you to run R scripts directly in QGIS.
- Open QGIS and Run as administrator
- Go to Plugins → Manage and Install Plugins…
- Search for “Processing R Provider”
- Click Install Plugin
- After installation, verify the plugin is activated in Plugins → Installed
The Processing R Provider plugin in QGIS Plugin Manager - ensure it shows as “Installed”
Step 3: Download and Configure LCZ4r Scripts
3 Configure LCZ4r Scripts
Integrate LCZ4r functionality into QGIS by downloading and configuring the R scripts.
- Visit the Multilingual LCZ4r-QGIS Plugin page
- Download the R scripts in your preferred language
- Unzip the downloaded file and save the scripts in an easily
accessible folder (e.g.,
Documents/LCZ4r_scripts/) - Open QGIS and navigate to:
- Settings → Options… → Processing → Providers → R
- Under R scripts folder, add the path to your LCZ4r scripts folder
- Disable “Use user library instead of system libraries”
- Click OK to save your settings
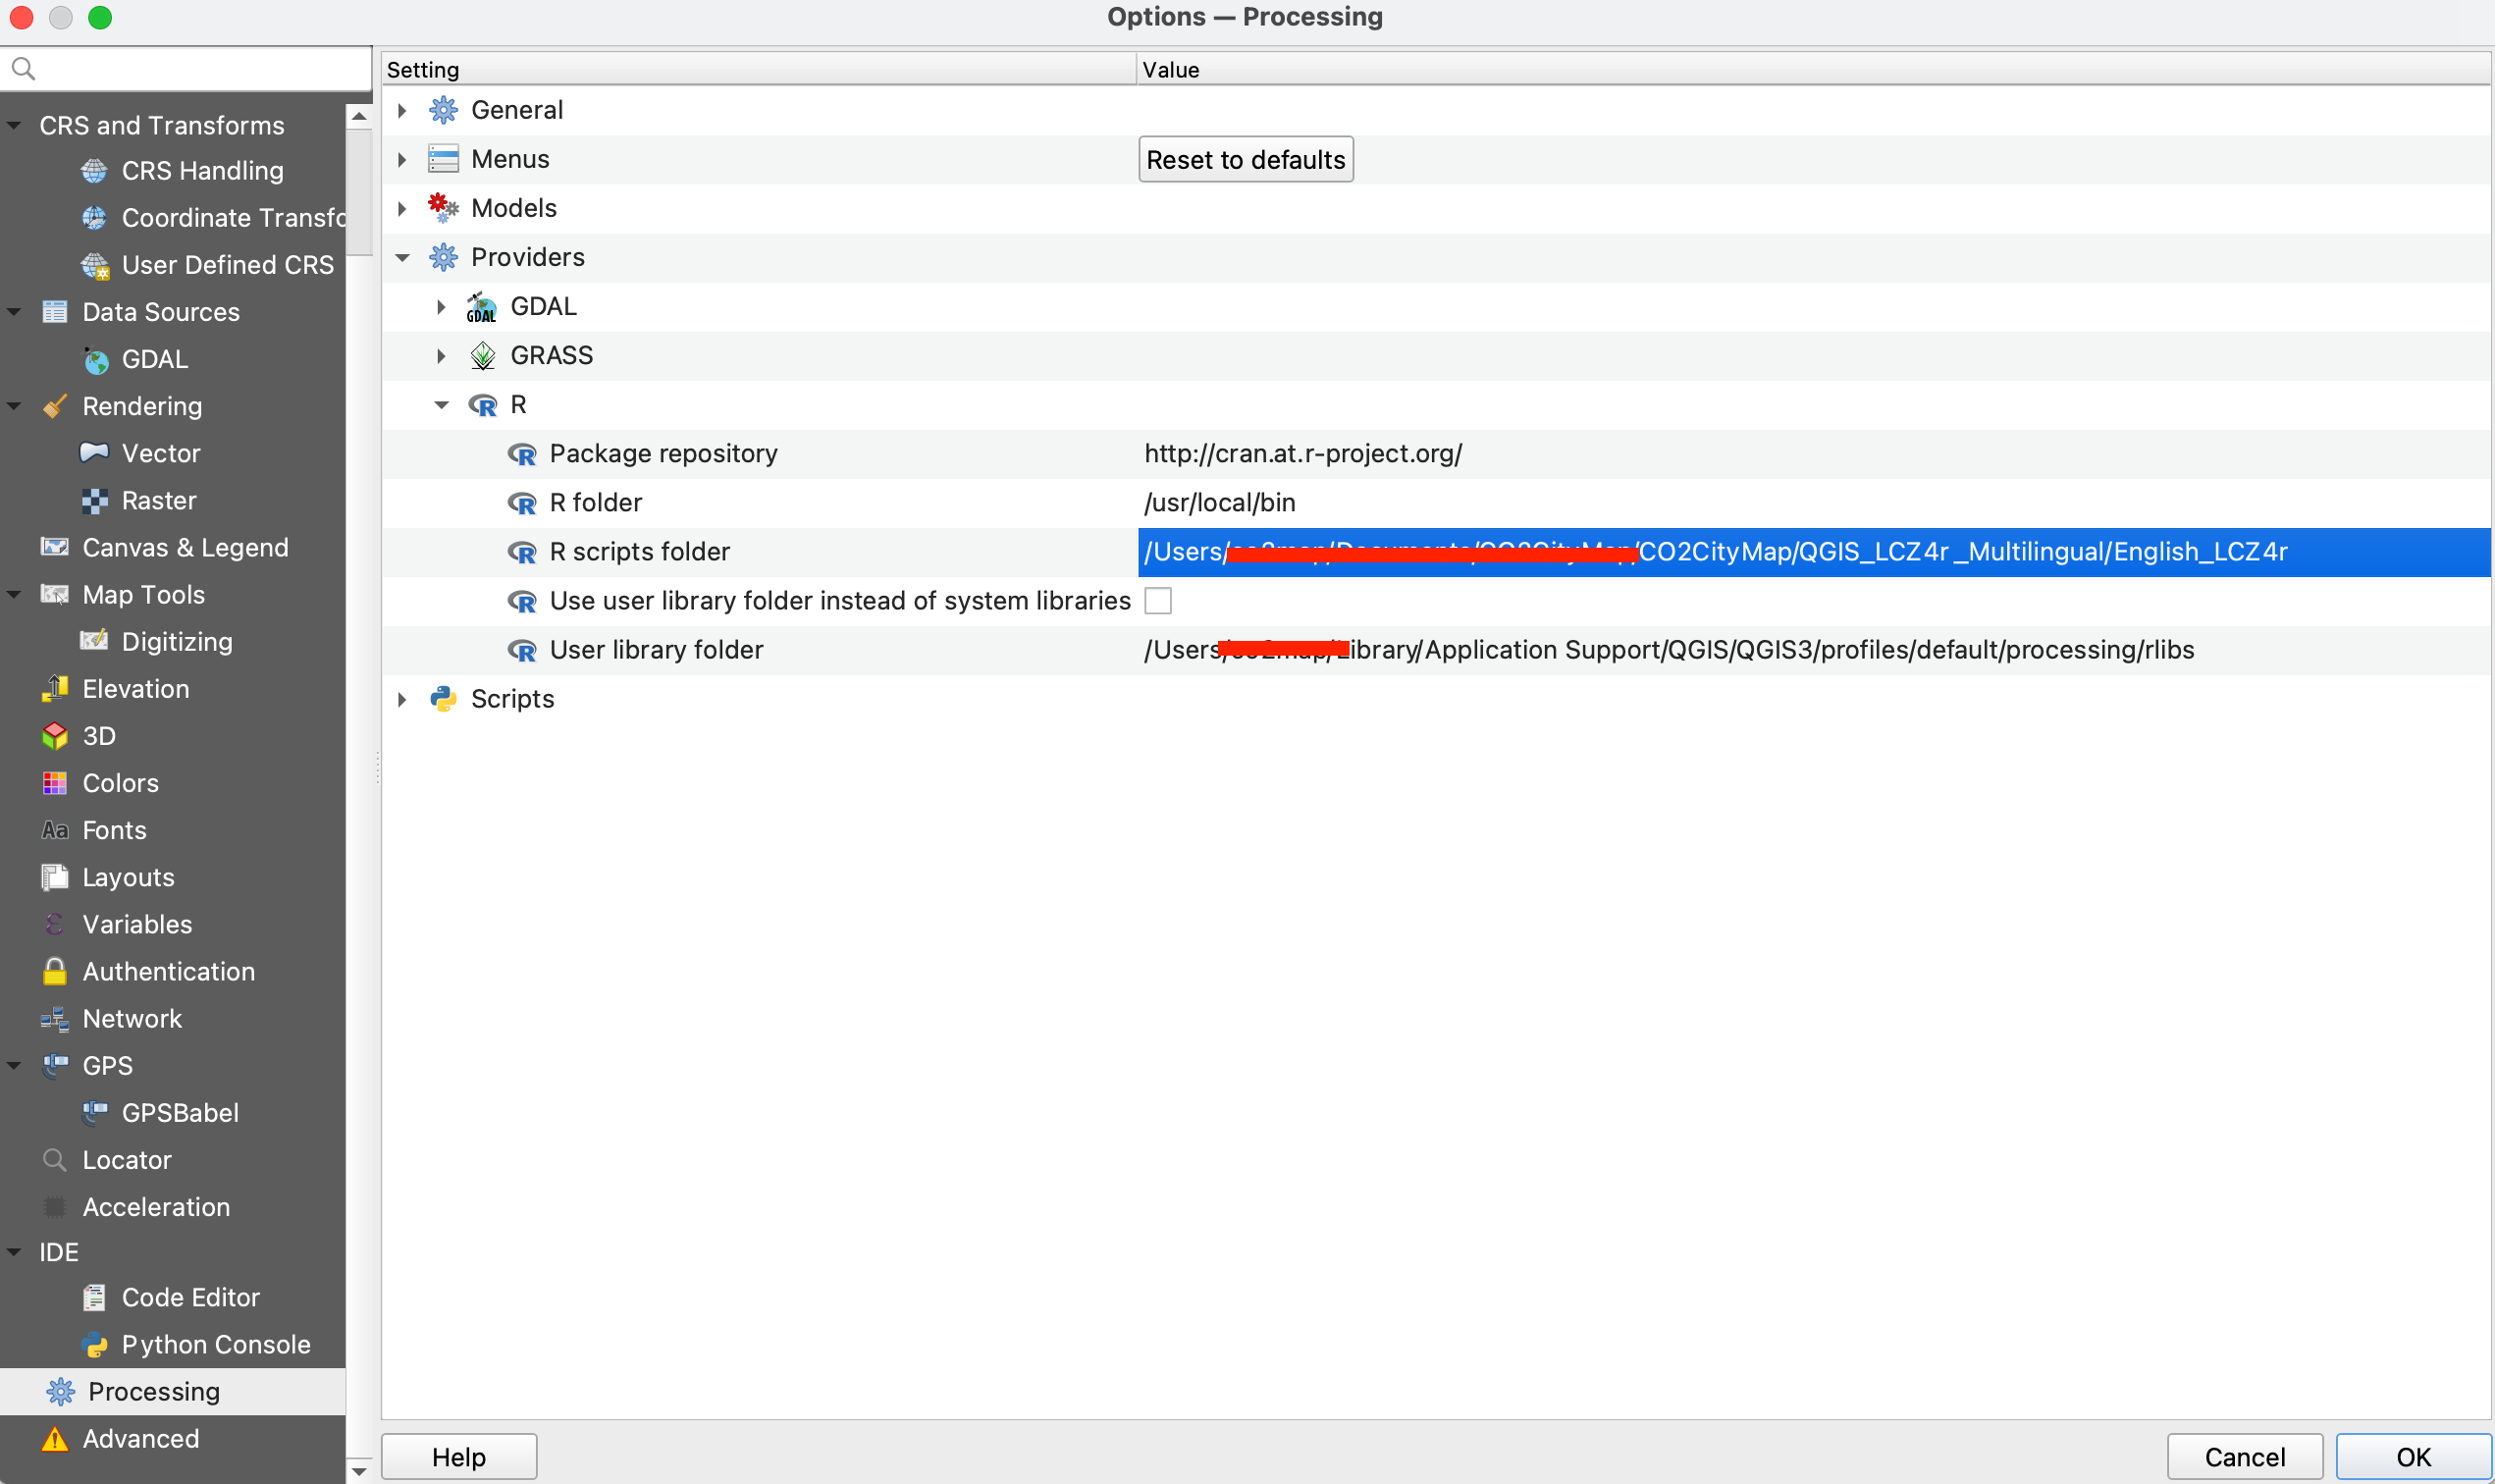
Setting the R scripts folder path in QGIS Processing options
Step 4: Verify Script Installation
4 Verify Installation
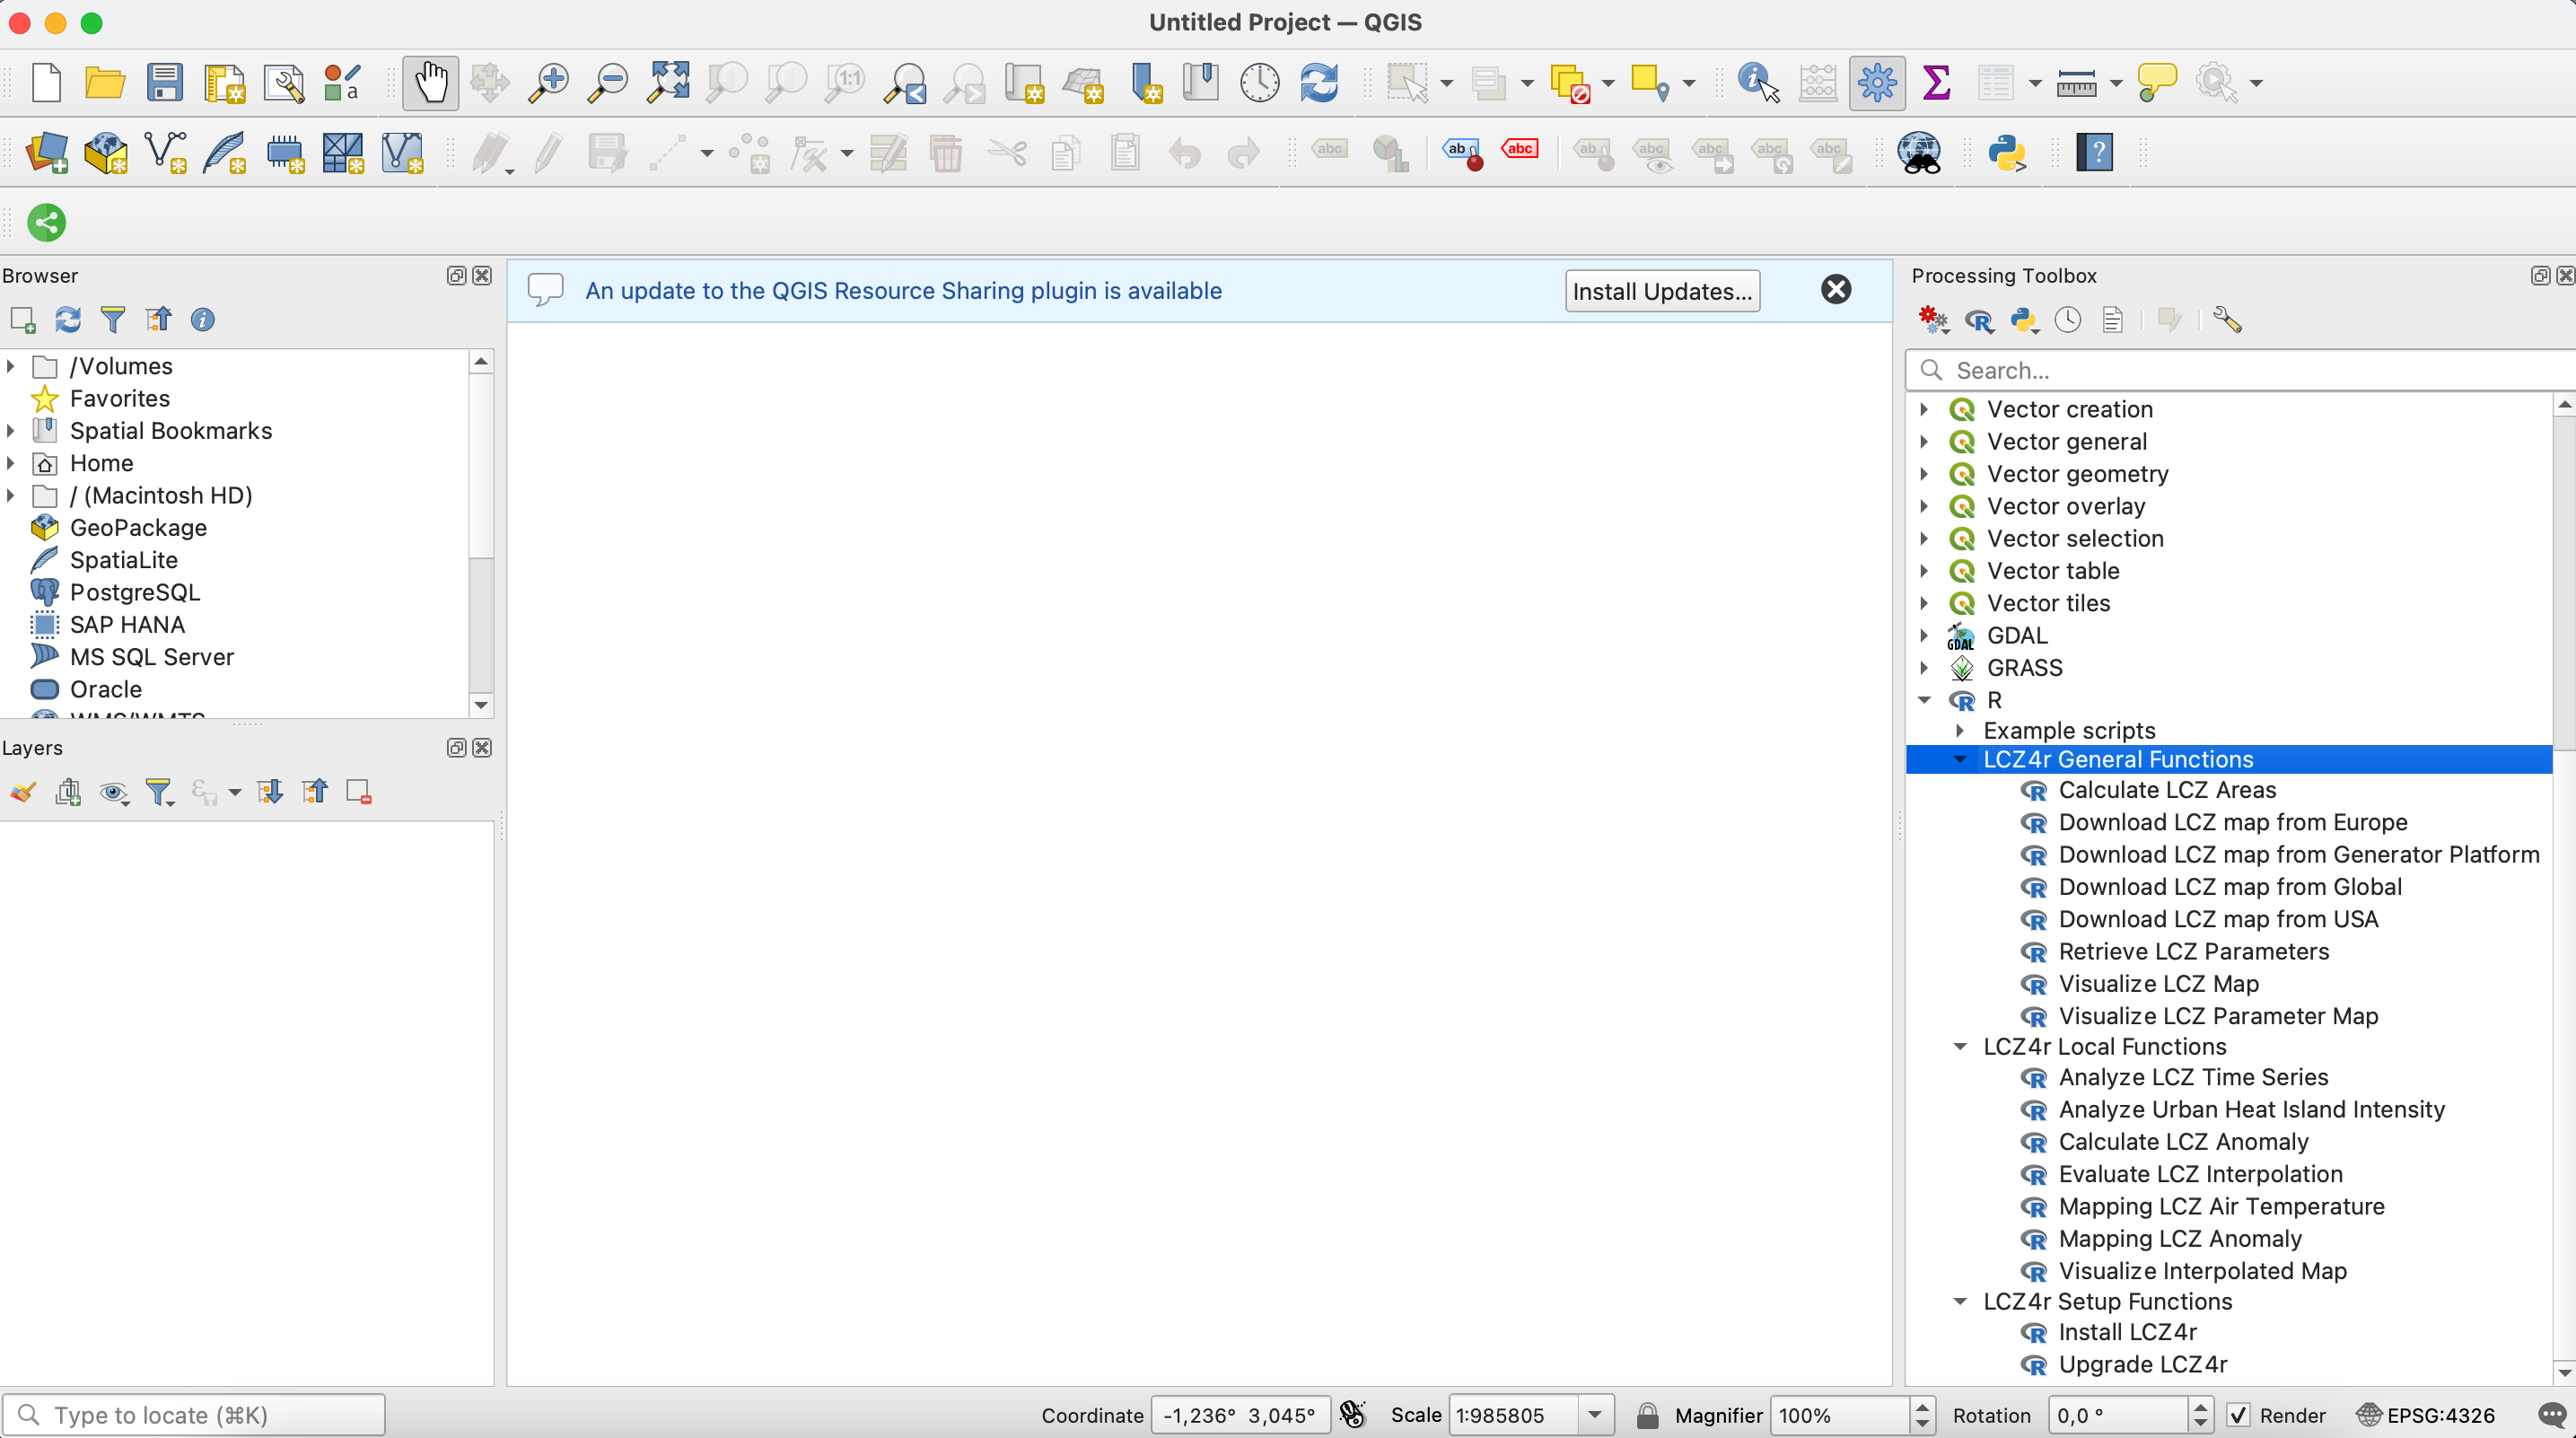
If everything is configured correctly, you should see LCZ4r functions in the Processing Toolbox.
- Open the Processing Toolbox in QGIS (View → Panels → Processing Toolbox)
- Navigate to R → Example Scripts
- You should see three LCZ4r categories:
- LCZ4r Setup Functions - Installation and update tools
- LCZ4r General Functions - Basic LCZ operations
- LCZ4r Local Functions - Advanced climate analysis
Step 5: Install LCZ4r Package and Dependencies
5 Install LCZ4r Package
Run the installation script to set up all required R packages.
- In the Processing Toolbox, expand R → LCZ4r Setup Functions
- Double-click Install LCZ4r
- Click Run
⏱️ First Time Installation: The first run may take 5-10 minutes as it installs all dependencies (over 50 packages). Please be patient!
Step 6: Run Your First LCZ4r Script
6 Test Your Installation
Run a test script to confirm everything works correctly.
- In the Processing Toolbox, expand R → LCZ4r General Functions
- Double-click Download LCZ map
- Enter your city name (e.g., “Berlin”)
- Click Run
🌟 Success! Once the process completes, you should see the output LCZ map in your QGIS canvas. Congratulations! You’re now ready to explore all LCZ4r functions!
Step 7: Regular Updates and Language Selection
7 Keep LCZ4r Updated
To ensure you benefit from the latest improvements and language updates:
- In the Processing Toolbox, expand R → LCZ4r Setup Functions
- Double-click Upgrade LCZ4r
- Select your preferred language from the dropdown menu
- Click Run
💡 Language Switching: You can install multiple language versions. To switch languages, simply re-run the Upgrade LCZ4r script and select your preferred language.
🔧 Troubleshooting Common Issues
| Issue | Possible Solution |
|---|---|
| R not found | Ensure R is in your system PATH. Reinstall R with “Add to PATH” option |
| Plugin not showing | Restart QGIS after installing Processing R Provider |
| Package installation fails | Run as administrator (Windows) or check internet connection |
| Scripts not appearing | Verify R scripts folder path in Processing settings |
| Language not changing | Run Upgrade LCZ4r script again and select language |
📚 Next Steps
Now that LCZ4r is installed in QGIS, explore these resources:
- General Functions: Learn to download and visualize LCZ maps
- Local Functions: Analyze time series, thermal anomalies, and UHI intensity
- Temperature Modeling: Create interpolated temperature maps
📬 Have feedback or suggestions?
We welcome your feedback and suggestions! If you have ideas for improvements or spot any issues, please let us know. Click the button below to submit a new issue on our GitHub repository.
Open GitHub issue